Fee Tables |
||
By setting up custom fee tables for your clients, you can make sure that specific clients who order appraisals on your Appraiser XSite always see the fees that you've set up specifically for them. The correct fee table will appear when your client logs into your Appraiser XSite with their XSite login to order an appraisal.
You can populate the custom fee table with any appraisal product that you currently offer on your Appraiser XSite. Each custom fee table can have its own products, prices, and fee notes.
To create a custom fee table...
- Access the Clients view in Mercury Network.
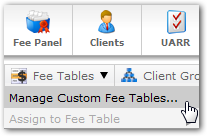
- Click Fee Tables, then select Manage Custom Fee
Tables...
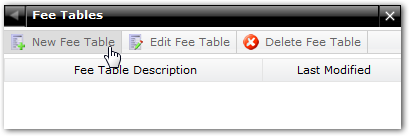
- In the window that appears, click New Fee Table.
- In the Fee Table Description field, type a descriptive
word or phrase for the new fee table.

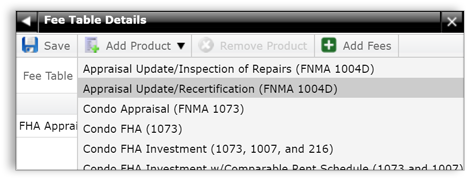
- Click Add Product, and click on any product in the
drop-down list to add it to the fee table. Repeat this step until all the
intended products appear in the fee table. If you need to remove a product
that you've added, select the product and click Remove
Product.
- For each product in the list, you can specify a Client
Fee, and Fee Notes.
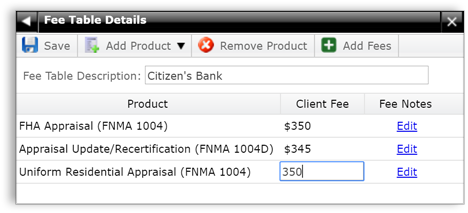
- To set a new Client Fee, double-click in the Client Fee column for the product, and a field will appear allowing you to enter the numerical fee. Enter the fee, and press Enter to exit the field.
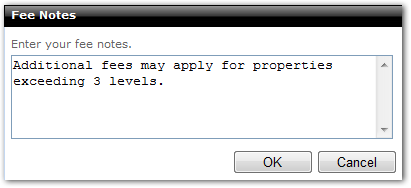
- To add a new Fee Note, click Edit in
the Fee Notes column for the product, and enter any notes
you'd like in the field provided, then click OK.
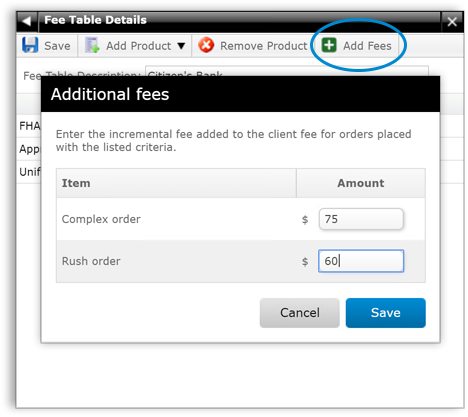
- You can add fees for Rush and Complex orders which will
automatically be included in the overall fee for orders where those
characteristics have been selected. Here's how:
- Click Add Fees on the toolbar in the Fee Table Details window.
- Enter a fee in the Amount field for Complex order and/or Rush order.
- Click OK to return to the Fee Table Details
window.
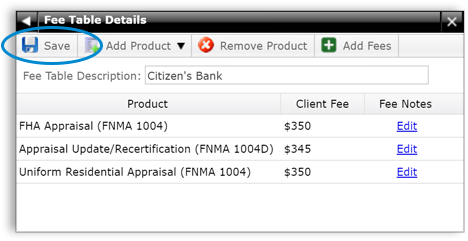
- When all the products have been added with correct Client Fees and
Fee Notes, click Save in the upper-left to commit the
changes. This will return you to the list of fee tables.
To edit an existing fee table...
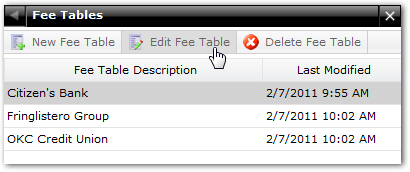
- In Clients, click Fee Tables. In the Fee
Tables window, double-click the fee table you'd like to edit.
Alternately, select the fee table you'd like to edit, then click Edit
Fee Table.
When the fee table opens, make changes to the settings as needed.
- Click Save in the upper-left to commit your changes.
After you've created a custom fee table, you'll need to assign clients to that fee table. To assign a client to any fee table...
- In Clients, select any client in the list who already has an XSite login.
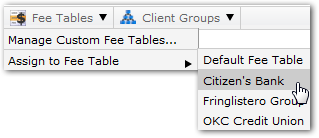
- Click Fee Tables, then click Assign to Fee
Table. A fly-out menu will appear, allowing you to click the custom
fee table to which this client will be assigned.
- After you assign the client, the new assignment will be reflected in the
Fee Table column for that client.

- To remove a client from the fee table, select the client in the list, click Fee Table, choose Assign to Fee Table, the choose Default Fee Table. This simply assigns that client back to the default fee table. This will be effective immediately, with no need to click Save to commit your changes.
Mercury
Network and its products are trademarks |