Set Up Your Profile |
||
You'll need to supply some important information to receive the right orders from Mercury Network clients. The steps below will help you get ready.
Logging in and accessing your user settings.
- Start by visiting https://vendor.MercuryVMP.com and log in using your a la mode Username and Password, or click Sign Up to create a new account.
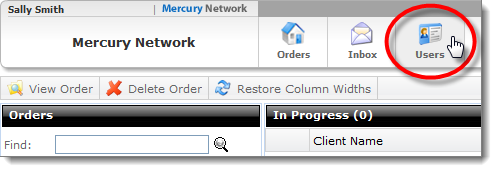
- Once you've logged in, click Users at the top of the
window.
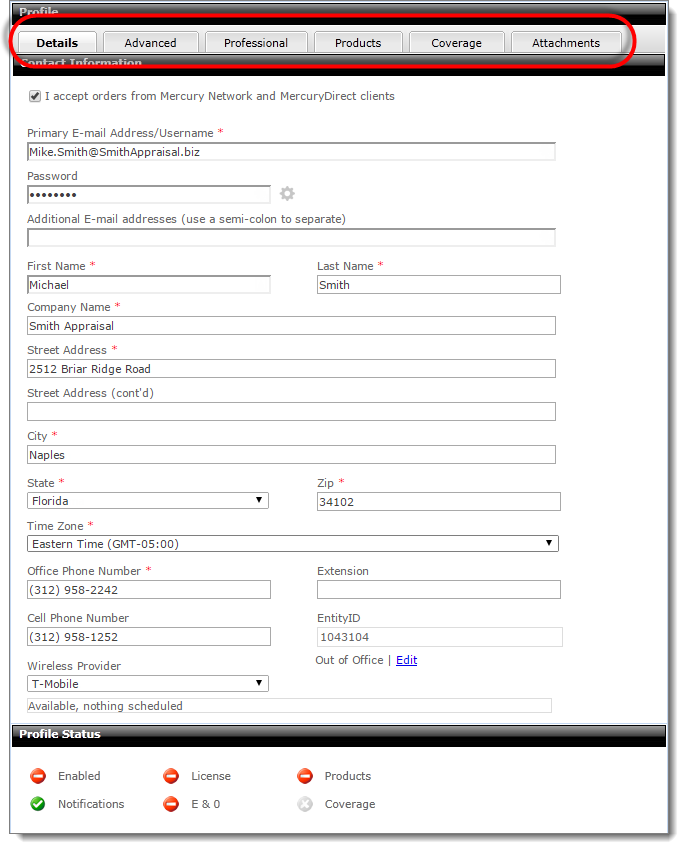
- Click through the series of tabs towards the top of the screen to fill out
or edit your profile information.

- As you click each tab, enter the information that's relevant to the type of orders you accept, how you prefer to be notified, and details about your professional qualifications.
Click each panel below to expand them and view additional information on filling out the various sections and completing your profile.
Details
The Details tab is where you'll enter your personal information including your address, email addresses, phone numbers, and time zone. At a minimum, you'll need to complete any fields marked with an asterisk, since they're required.
|
||||
In addition to entering your detailed contact info, you can "enable" your Mercury Network profile to accept orders by checking the I accept orders from Mercury Network and MercuryDirect clients box. You won't be able to accept orders on Mercury Network until you check this box.

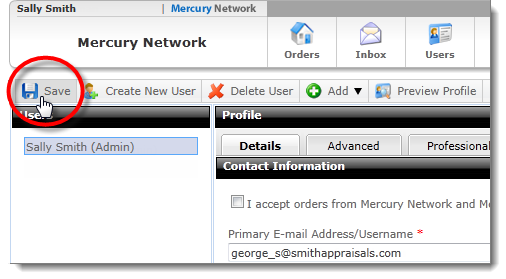
As you finish entering your information, it's a good idea to click the Save button in the upper left to make sure your changes take effect.
Advanced
On the Advanced tab, you'll select all of your notification options, including fax, email, and text messages.
The first section of options relates to the notifications that you'll receive for orders that are specifically assigned to you as the vendor. The second section of options relates to orders that you're managing, but the order may not be specifically assigned to you.
In the second section, click the Tool Icon next to Send Email to choose specific status changes that should trigger a notification.
![]()
Go ahead and click the Save button in the upper-left after changing your notification options.
Professional
On the Professional tab, you'll set up the types of orders you'll accept, as well as provide your professional qualifications and other details about assignment completion.
- Professional Experience
- Check the box for each type of assignment that you fulfill. As you select each item, provide the Years of Experience you have fulfilling that type of assignment. Just below the assignment types, place a check next to each designation/certification you possess. If you hold an FHA designation, make sure that you check the FHA box — leaving it unchecked can prevent you from receiving FHA work.
- Licenses
- Here you'll see any licenses currently set up in your Mercury Network
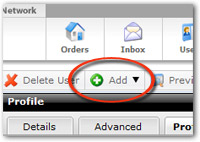
profile. If you need to add a new license, click the
Add button on the toolbar near the top, and choose
License, then supply the necessary license information.
Mercury Network Validates license information using the national registry
available at http://www.asc.gov. Make sure you enter your license
exactly as it appears in the national registry — if you license is off by one
number or has any additional charachters, your license won't validate properly
which can prevent you from receiving orders.
Note: Your license can only be added to one Mercury Network account at a time. If your license is set up on another account, remove it before adding it to the new account. As you hover your mouse over any existing license in the License section, you'll see the Edit and Remove icons appear to the right, allowing you to make changes to your existing licenses.

Click here to jump to the Attachments section below for instructions on uploading a copy of your license or insurance policy.
- Insurance Policies
- Here you'll see any existing insurance policies you've set up in your
profile. If you need to add one, click the Add button
on the toolbar near the top, and choose Insurance Policy so
you can add the necessary information.
As you hover your mouse over any existing insurance policies, you'll see the Edit and Remove icons appear to the right, allowing you to make changes to your existing licenses. - Software
- Using the drop-downs provided, select the software you use to complete each assignment type. While this information is not required, some clients will be happy to know what tools you use to fulfill their orders.
Click Save in the upper-left to save your changes.
Products
On the Products tab, specify the types of products you provide, as well as your published fee for each to make sure you're ready to accept Mercury Network orders:
- Click the click the Product tab for any type of order you intend to fulfill.
- For each product for which you will fulfill an order, type your fee in the field labeled Fee.
- For each fee you've entered, click the Edit link in the
Fee Notes column and type any notes your client should read
before they place an order with you. They are required to read and agree
to these notes before finishing their order. So, while the fee notes are
not required, it is recommended that you provide whatever detailed information
your clients should have regarding your fees.

Note: If you are an FHA Appraiser, make sure to enter your fees for FHA Products. Neglecting to do so prevents clients from placing orders for these products.
After you've entered your fees and notes, click Save in the upper-left to keep your changes.
Coverage
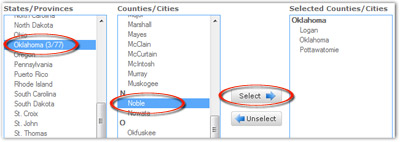
On the Coverage tab, you'll select all the areas in which you can fulfill the types of assignments you offer. You'll do this by selecting the state, county, and city in which you provide coverage. You can choose an unlimited number of counties in up to 3 different states.
To select your coverage area, click the state on the left column, then choose the county or city in the middle column. To add that city or county to your coverage, click the Select button to move it to the right column.
|
||||
After you've selected your coverage, click the Save button in the upper-left to save your changes.
Attachments
The Attachments tab allows you to upload digital copies of your certifications, licenses, or compliance information, for example. Many of your clients appreciate the transparency of seeing your license and insurance information. Plus, you can set yourself apart by displaying your hard-earned certifications.
To upload an attachment, click Add in the toolbar and select the appropriate document type. You can upload any type of file, but it is best to upload common file types that most anyone can view, such as PDFs, images, or Word documents.
|
||||
Set Up a Sub-Account
- Log in to your Mercury Network account and click Users in
the top toolbar.

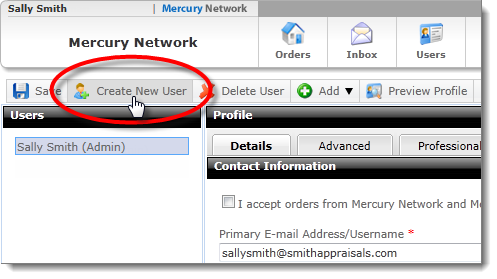
- Click Create New User.
- At minimum, fill out the required information in the
Details tab that's indicated by red asterisks ( * ). Then, click through the series
of tabs towards the top of the screen to fill out or edit any additional
profile information.
- When you're finished, click Save to create the new user.
Mercury
Network and its products are trademarks |