Automated Client Group Settings |
||
Follow the instructions below to adjust the automated settings for a Client Group:
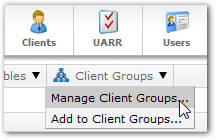
- In the Clients section, click
Client Groups, and select
Manage Client Groups from the drop-down menu.
- In the list of Client Groups, select the group containing the members for whom you'd like to change the settings and click Edit Group. Or, you can just double-click the name of the group in the list.
- In the Client Group Details window, click the
Automated tab.

From here, you have several automated settings that can be adjusted:
- SureReceipts Delivery
-
- In the first drop-down, choose whether you want to
always or never send a PDF copy of the
appraisal to the borrower for this Client Group.
Note: Selecting Always or Never affects every order placed with this Client Group and can't be configured on a per-order basis. If you want to choose whether or not to send the report to the borrower using SureReceipts, leave the option set to (None Selected). - In the second drop-down, choose the time delay for automatically sending the report. This can be set in hours or business days. (Client sync settings can be set in VMP XSites Status mapping.)
- Enter any additional comments that you want to accompany the PDF of the appraisal when it is sent.
- Check Include co-borrower when present to also deliver the appraisal, and any messages, to the co-borrower e-mail address as well, when present.
- Check Cancel scheduled delivery when revision is requested to stop automatic delivery when a revision is requested within the timeframe of the delay. This option is only available when the time delay is greater than "immediately."
- Check Use this group's company name for SureReceipts
delivery so the borrower will see the company name (entered on
the Details tab) when the
appraisal is securely delivered.
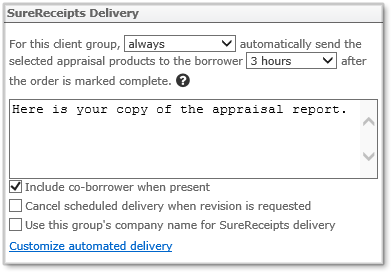
- Click Customize automated delivery to select which products should be automatically delivered.
- In the first drop-down, choose whether you want to
always or never send a PDF copy of the
appraisal to the borrower for this Client Group.
- Client Group Requirements
- This section allows you to configure client-specific instructions to be
included with every order placed in this group, and upload a document to be
included.
- Check the box below the text area if you prefer to use your custom instructions instead of the Product Requirements configured in your Preferences.
- Check the Use Quality Control (QC) folders option if you wish orders from this client to use the detailed quality control order statuses and folders. If unchecked, orders from this client will go straight to completed status when the appraisal is delivered by the vendor.
- Select Additional recipients receive ALL notifications if you want all order notifications to be sent to email addresses entered in the Additional recipients field on the client's order form. This is the default setting.
- Select Additional recipients receive the same notifications as the client placing the order if you want the same notifications the client recieves to be sent to the email addresses entered in the Additional recipients field on the client's order form.
- Enter any custom instructions for the clients in this group in the Instructions text area.
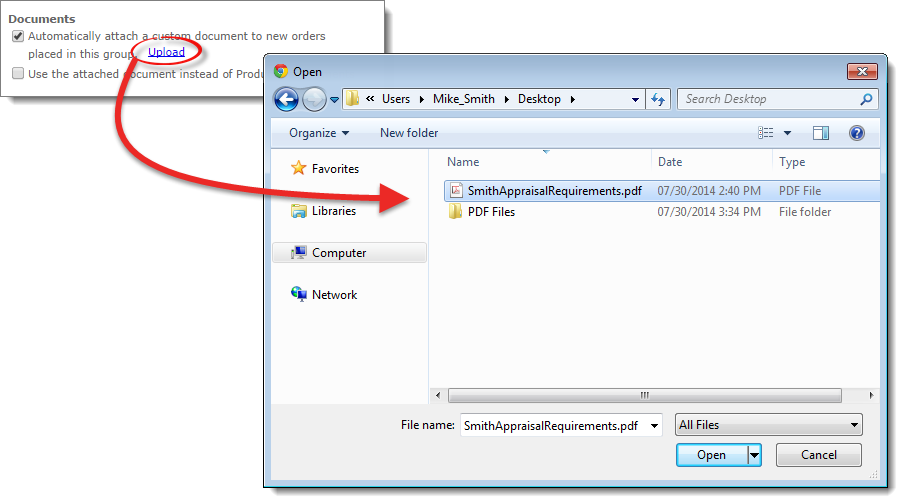
Note: If left unchecked, any custom instructions you've entered are still included with the order along with the Product Requirements when an order is placed with this Client Group. Checking this option overrides the Product Requirements and only includes your custom instructions with the order. - In the Documents section, check the first box to attach a custom document to each new order placed with this Client Group.
- Click Upload to locate the file you want to use,
select it, and click Open to upload and use it as the
attachment with each new order for this group.
- Check the second box to use the custom document you uploaded instead
of the Product Requirements
configured in your Preferences.
Note: If left unchecked, any custom documents you've uploaded are still included with the order along with any documents configured for the product ordered. Checking this option overrides the the documents configured for the product ordered and only includes the documents you've uploaded in the Client Group Requirements. 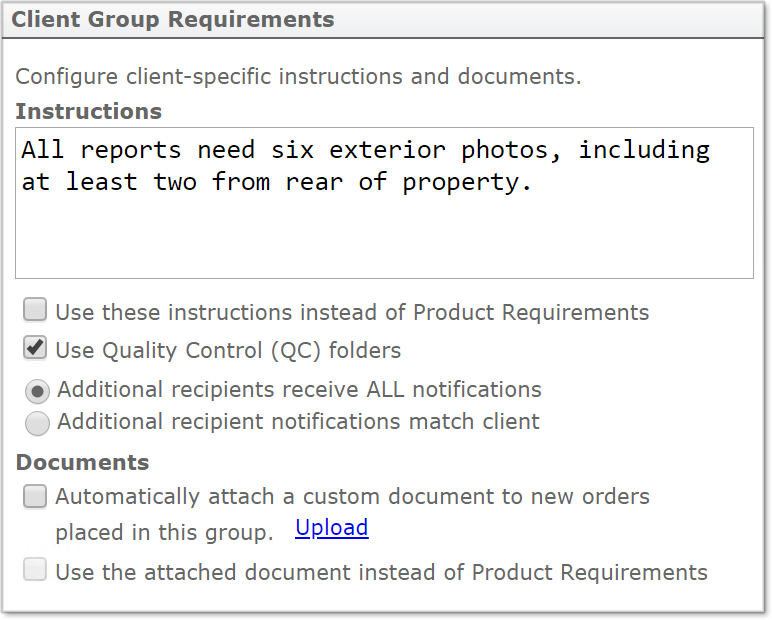
- Xcelerator assignment
- Check this box to use Xcelerator for orders in this client group. Xcelerator will help streamline scheduling the inspection by digitally connecting the inspection contact to the appraiser to coordinate their schedules on any device.
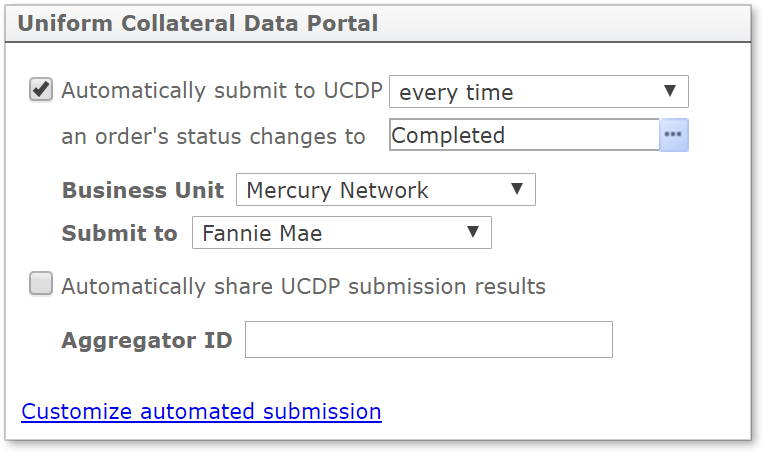
- Uniform Collateral Data Portal (UCDP)
- This section allows you to configure automatic submission to
UCDP. Before configuring these settings, you'll need to configure
your UCDP account settings in the Connection Settings section of your
Preferences. Once your account settings are configured:
- Choose the Business Unit and where you want to Submit to using the first two drop-down menus.
- Check the box to Automatically submit to UCDP, and then choose whether you want to submit it the first time or every time a specific order status is applied to an order.
- Choose the specific order status that will automatically submit the appraisal to UCDP when that status is applied.
- Check Automatically share all UCDP submission results if you'd like to share UCDP submission results with an Aggregator, then enter the Aggregator ID.
- Lastly, click Customize automated submission to select which Loan types and Form types will be automatically submitted. An order must match both the selected form and loan types in order to be automatically submitted.
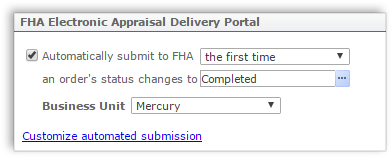
- FHA Electronic Appraisal Delivery (EAD) Portal
- This section allows you to configure automatic submission to FHA via
the EAD portal. Before configuring these settings, you'll need to
configure your FHA connection settings in
the Connection Settings section of
Preferences. Once your account settings are configured:
- Check the box to Automatically submit to FHA then choose whether you want to submit it the first time or every time a specific order status is applied to an order assigned to this Client Group.
- Choose the specific order status that will automatically submit the appraisal to FHA when that status is applied.
- Select the Business Unit which should be used when an appraisal is submitted for this Client Group.
- Lastly, click Customize automated submission to select which Loan types and Form types will be automatically submitted. An order must match both the selected form and loan types in order to be automatically submitted.
- Invoicing Options
- Use these options to choose when an invoice should automatically be
created and attached to the order for this Client Group. Click
Customize your invoice number and due date options for
even more control over these automatic settings.
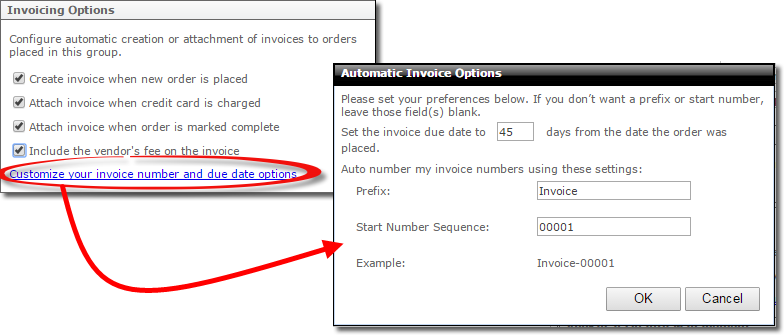
- Enter the number of days from which the order was placed to be used as the due date for the invoice.
- Use the Auto number my invoices section to set the numbering prefix and the starting number for the sequence.
Mercury
Network and its products are trademarks |