Configure Client and Vendor Settings |
||
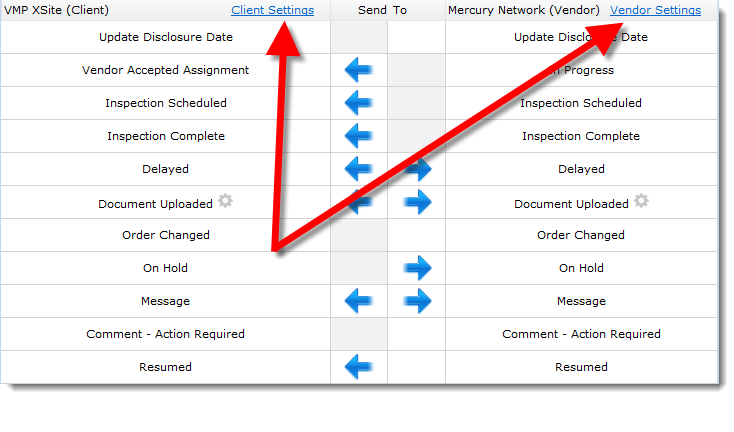
In the status mapping configuration area, you also have the option to configure settings specific to your client and vendor that determine how comments are handled when certain statuses are applied.
Client Settings |
||
Follow the steps below to configure the distribution of client comments:
- Click Client Settings in the header of the VMP XSite (Client) column.
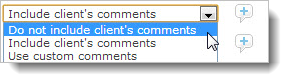
- Choose one of three actions for each status event:
Apply these settings in any combination to the following statuses:
· Vendor Accepted Assignment
· Message
· Inspection Scheduled
· Resumed
· Inspection Complete
· canceled
· Delayed
· Pending Quality Review
- When Use custom comments is selected, it activates the custom
comments icon
 to the right of the
drop-down menu beside each status event. Click the icon to enter your custom
comments and then click OK. Your custom comments are sent to
your client any time that status is applied and synced.
to the right of the
drop-down menu beside each status event. Click the icon to enter your custom
comments and then click OK. Your custom comments are sent to
your client any time that status is applied and synced.
- When you are finished configuring your settings, click Save on the lower right of the Sync to VMP window, then click Save again on the upper left of the Status Mapping Configuration area.
Vendor Settings |
||
Follow the steps below to configure the distribution of vendor comments:
- Click Vendor Settings on the upper right of the Mercury Network (Vendor) column.
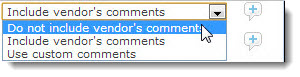
- Choose one of three actions for each status event:
These settings can be applied in any combination to the following statuses:
· Delayed
· Comment - Action Required
· On Hold
· Resumed
· Message
· Revision Needed
· canceled
- When Use custom comments is selected, it activates the custom
comments icon to the right of the
drop-down menu beside each status event. Click the icon to enter your custom
comments and then click OK. Your custom comments are sent to
your vendor any time that status is applied and synced.
- When you are finished configuring your settings, click Save on the lower right of the Sync to Vendor window, then click Save again on the upper left of the Status Mapping Configuration area.
Mercury
Network and its products are trademarks |