Compliance Certificate |
||
You can set up a compliance certificate to be included with the completed order when it is sent to the client. The certificate can include dynamic data such as property information, appraised value, and the appraiser license information as it appears in the final report. You can also customize the compliance certificate to include your logo and compliance policies.
To set up your compliance certificate...
- Access VMP XSite Preferences.
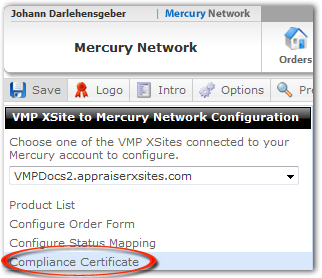
- If you have multiple VMP XSites connected to your Mercury Network account, use the drop-down under VMP XSite to Mercury Network Configuration to select the site for which you'd like to make changes.
- On the left, choose Compliance Certificate.

- Now, several options appear that let you customize the compliance
certificate's contents. The first set of tools for customizing the compliance
certificate appears under the main menu bar.

- Save: Click this button at any time to commit the changes you've made to the compliance certificate.
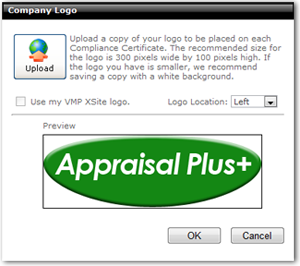
- Logo: Click this button to display the Company
Logo dialog, where you can upload and position the logo that will
appear on your compliance certificate. For best results, it's recommended
that the compliance certificate be 300 wide x 100 tall - measured in pixels.
 Click
Upload to upload the image file for your logo to your
compliance certificate. After you upload the file, the preview will appear
in the Preview area in this dialog.
- If you've uploaded a logo to your Appraiser XSite in Theme Prefs, click Use my VMP XSite logo to use that logo on your compliance certificate.
- Use the Logo Location drop-down to choose how the
logo should be positioned at the top of the compliance certificate
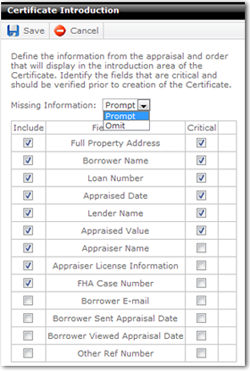
- Intro: Click this button to define the contents of the
compliance certificate's intro, which will appear at the top of the
compliance certificate, just under the logo.

- Save: Click this button at any time to commit your changes and close the window.
- Cancel: Click this button at any time to discard your changes and close the window.
- Missing Information: Choose Prompt or Omit from this drop-down to decide whether fields with missing information should be disregarded, or if the user should see a prompt for the missing information.
- Include: Check this box for each item that should be included in the compliance certificate intro.
- Critical: Check this box for each item that should be
considered critical. Each critical item will be verified with a prompt
prior to creation of the certificate.
- Options: Click this button to set up the compliance certificate with your company information, as well as choose the font for the certificate.
- Preview: Click this button to see a PDF preview of the certificate. Note that when viewing the preview, the contents that would normally populate from the order and report will be substituted with fake information.
- Restore Default: Click this button to set the compliance certificate back to its default settings. This will remove any customizations you have saved.
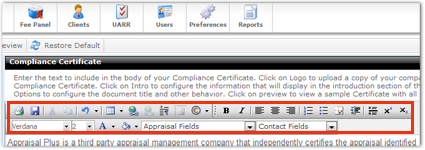
- On the right, you'll see an area where you can edit the text of the
compliance certificate. This editor has tools that are similar to any word
processor, allowing you to select fonts, insert tables and images, and use
special characters. There are a couple of special tools to notice here:

- The Appraisal Fields drop-down lets you insert "merge fields" into the certificate. These merge fields will dynamically fill information from the appraisal report to which the compliance certificate is attached.
- The Contact Fields drop-down is similar to the Appraisal Fields drop-down, but lets you dynamically fill information from the company information you entered in the Options dialog - discussed above.
Mercury
Network and its products are trademarks |