Configure Status Mapping |
||
Status Mapping allows you to carefully control the flow of status updates to ensure that the parties involved with your orders only receive automatic status notifications that you deem appropriate. Follow the steps below to configure Status Mapping in Mercury Network:
- Log in to your Mercury Network account.
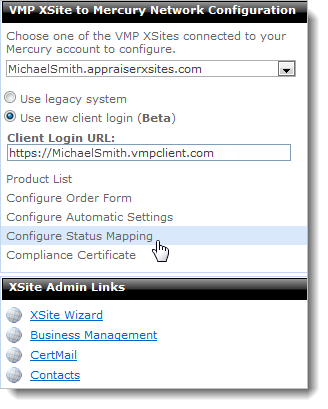
- Open VMP XSite Preferences by clicking Preferences in the toolbar at the top, then select VMP XSites from the drop-down menu.
- If you have multiple VMP XSites connected to your Mercury Network account, use the drop-down menu under VMP XSite to Mercury Network Configuration to select the site for which you'd like to make changes.
- On the left, click Configure Status Mapping.

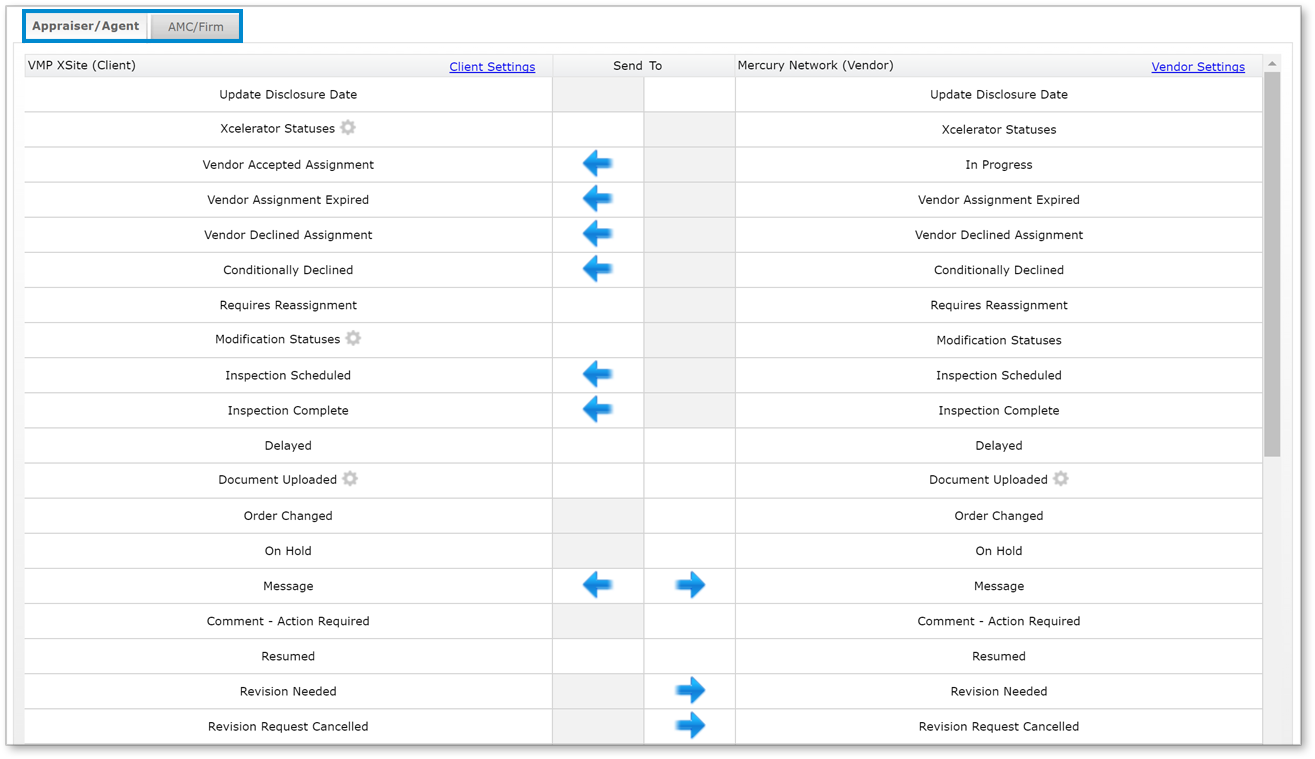
- Once the Status Mapping Configuration page loads, a grid
appears to the right that contains each of the order status events. This grid
allows you to choose the direction of sync for each available status. To set
the sync directions for a status, single-click in the appropriate block to
place a blue arrow beside the status event.
These settings may be configured separately for appraisers/agents and AMC/Firms. Just be sure to select the correct tab at the top left of the grid.
- Arrows pointing left indicate the Mercury Network status is synced to the XSite.
- Arrows pointing right indicate the XSite status is synced to Mercury Network.
- Some blocks are grayed out indicating the status cannot be synced in that direction.
- Click any cog to access more detailed controls.

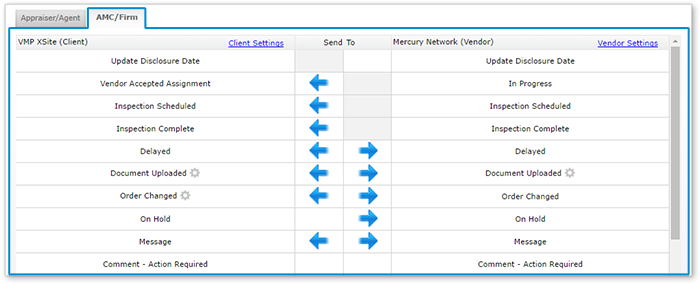
The AMC/Firms tab has a few small differences. For instance:
- The assignment expired and vendor decline items don't appear because AMCs automatically accept your orders.
- The cog next to Order Changed allows you to select the order
form changes you wish to automatically sync to the VMP
XSite.
- When you're finished configuring these settings, click Save on the upper left to save your changes.
 |
Click here for more information on what the arrows mean. |
Here's what the arrows mean:
- An arrow pointing left indicates that the status message flows to the client from the appraiser. For example, in the image above, the Inspection Scheduled status message is automatically delivered to the client when that status is set by the appraiser. Also note that, because the Inspection Scheduled message would only be set by the appraiser, it can only be delivered to the client.
- An arrow pointing right indicates that the status message flows to the appraiser from the client. For example, in the image above the Delayed status message is delivered to the appraiser when it's set by the client. However, if the appraiser sets the status as Delayed, a status update is not delivered to the client. This allows you to determine how to handle the delay, and control how your client is notified.
- A blank block indicates that no message is automatically delivered to either the appraiser or the client. This means that you manually control how the selected status is delivered, no matter who sets it. For example, in the image above, the Message status is not automatically delivered to either the client or the appraiser, letting you control how the message should be delivered to either party.
- Blocks that are grayed out indicate that you cannot sync a specific status in this direction because the scenario that would warrant a notification to be sent in that direction is not feasible. For example, the Inspection Scheduled status would only be set by the appraiser, and can only be sent to the client. Therefore, the block beside the vendor settings is grayed out, because the sync would never happen in this direction.
More:
Mercury
Network and its products are trademarks |

 Configure Client and Vendor Settings