Review Vendor Documents |
||
In the Review Documents tab, you can quickly see any new documents your vendors have uploaded to their profile, then review each one to accept it, or mark it to be updated by the vendor.
To see the Review Documents tab and use this feature, you'll need to first enable document review in your Fee Panel Options.
Here's how to review your vendors' documents:
- In Mercury Network, click Fee Panel.
- Click the Review Documents tab. Note that the tab will
have a red asterisk if there are any documents that require your
review.
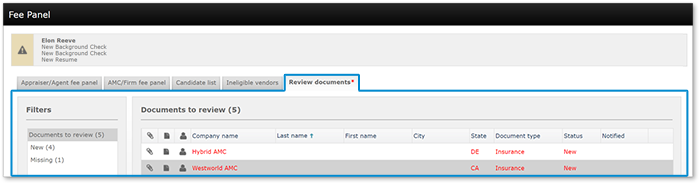
- On the left, you can select any of the three filters:
- Select Documents to Review to see any documents available for you to review, whether they are missing documents or new documents you haven't seen yet.
- Select New to display any new documents the vendor has uploaded which you have not reviewed yet.
- Select Missing to show any credentials for which the vendor has not uploaded any documentation since September 19, 2016.
- For any document in the list, there are a few things you can do:
- At a glance, you can see details about the vendor, the document type,
its current status, and whether the vendor has yet been notified about the
document. The paperclip icon
 indicates a document which has been
attached.
indicates a document which has been
attached.
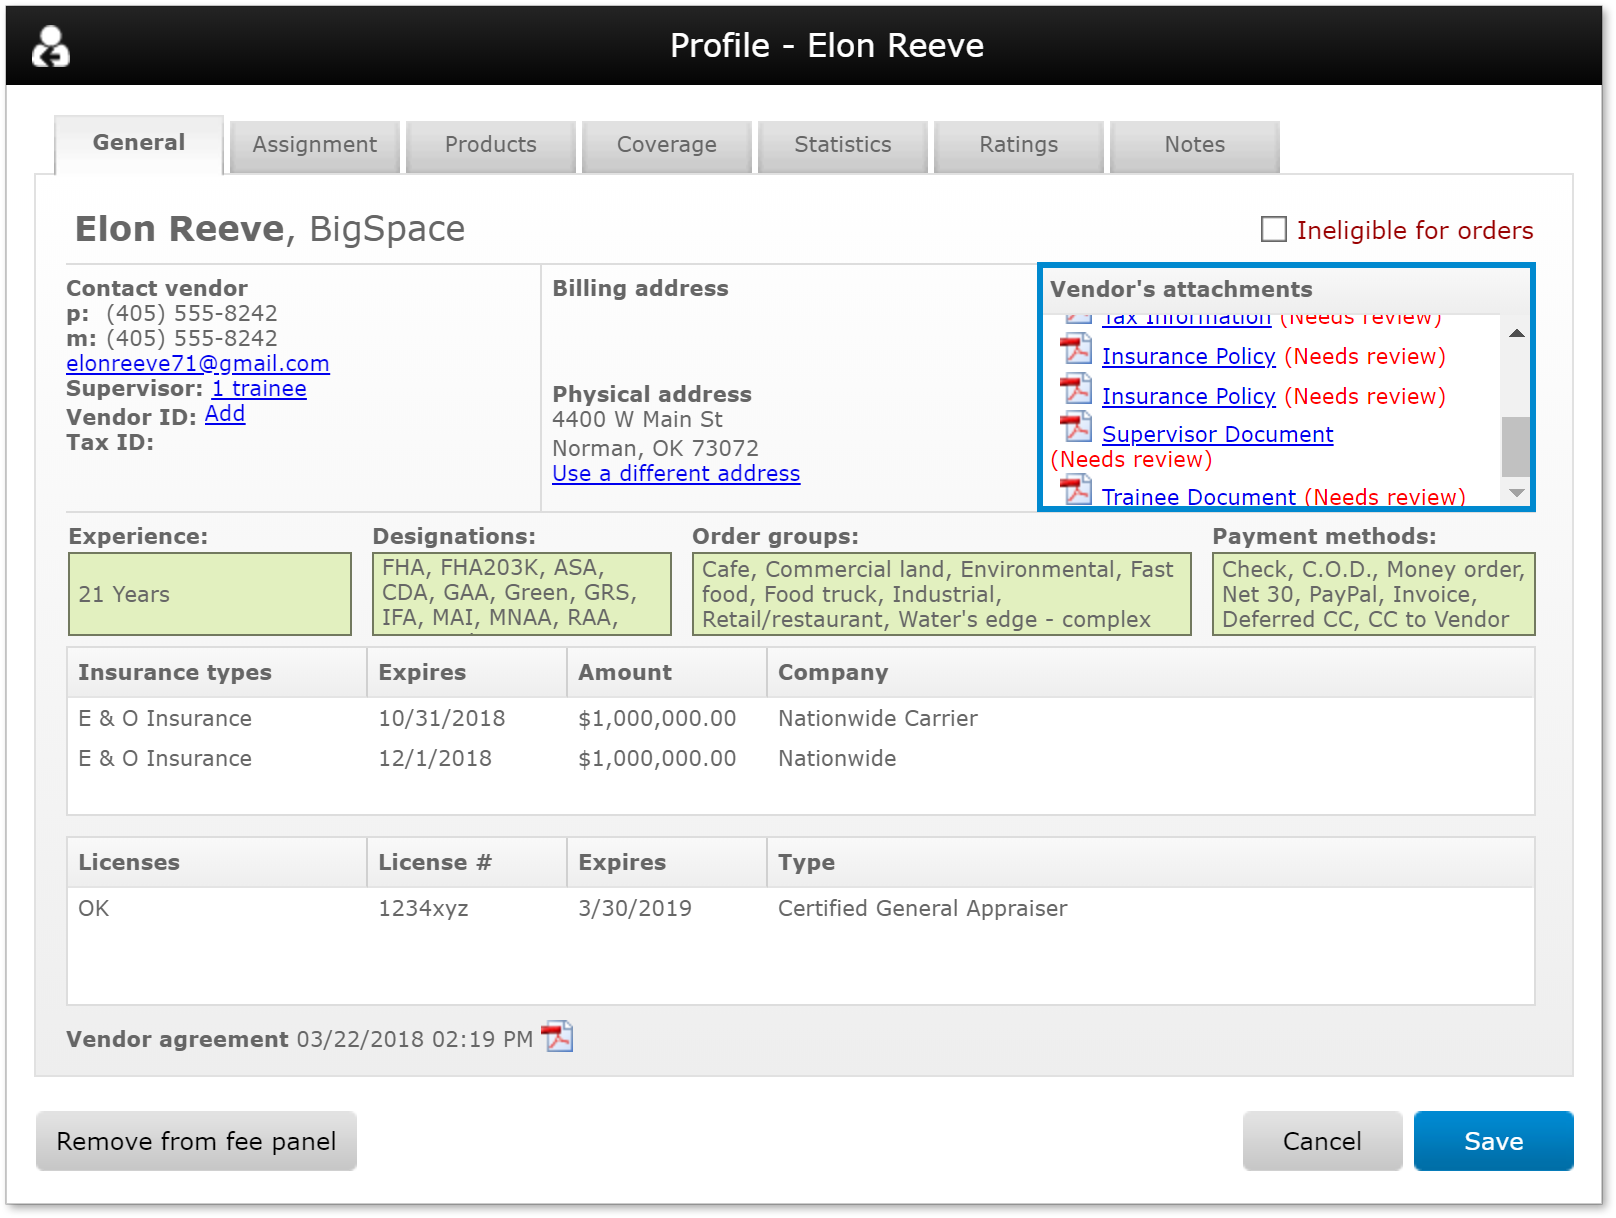
- Click the profile icon
 to open the vendor's profile. In the
profile window, the Vendor's attachments list shows any
documents the vendor has uploaded, as well as their status. Here's what the
status means:
to open the vendor's profile. In the
profile window, the Vendor's attachments list shows any
documents the vendor has uploaded, as well as their status. Here's what the
status means:
- Accepted - reviewed and accepted, or uploaded prior to September 19, 2016.
- Needs review - recently uploaded by vendor and not yet reviewed.
- Unmatched - document uploaded but not matched with a
specific license or insurance policy.
- Click the notes icon
 to open the Notes tab in the vendor's
profile. The Notes tab contains a record of any documents which
were accepted or marked for review, as well as any comments that were added
during document review.
to open the Notes tab in the vendor's
profile. The Notes tab contains a record of any documents which
were accepted or marked for review, as well as any comments that were added
during document review.
- Double-click any document in the list to begin reviewing the document.
- At a glance, you can see details about the vendor, the document type,
its current status, and whether the vendor has yet been notified about the
document. The paperclip icon
- When you double-click any new item in the Documents to Review
list, you'll see the Review documents window. Here, you can view
the document as well as any details the vendor provided when they uploaded it,
such as a license type, state, or expiration date. There are several things
you can do here:
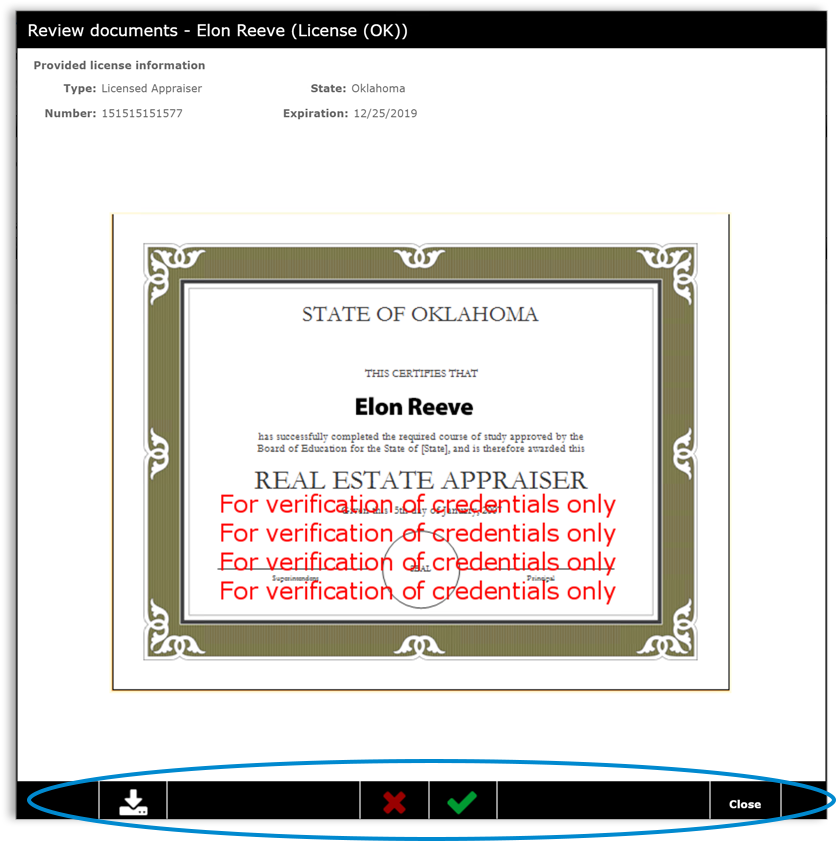
- To accept the document, click the green check at the bottom of the window. If there are more documents to review, the next document in the list will appear.
- To mark the document for review by your vendor, click the red X at the bottom of the window. When you do, you'll see the Enter comment window where you must type a message for your vendor which they'll see in the email notification regarding the documents they need to review. When you've typed your comment, click Send, and you'll return to the Review Documents tab in your fee panel or move to the next document for review (if one exists.)
- To download a copy of the document, click the download icon at the bottom-left.
- To close the Review documents window without making any changes, click Close at the bottom-right.
Mercury
Network and its products are trademarks |