Edit Products |
||
You can add, edit, and delete products that are available to be ordered using your VMP XSite. To make these changes to your products:
- Access VMP XSite Preferences.
- If you have multiple VMP XSites connected to your Mercury Network account, use the drop-down under VMP XSite to Mercury Network Configuration to select the site for which you'd like to make changes.
- Although you'll already be viewing your product list by default, you can
click Product List on the left at any time to return to this
view.
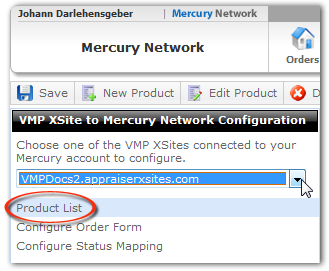
- When viewing the product list, you can do several things:
- If no products have been added, the Product Information panel on the
right offers a hyperlink to add a list of the default. Click the hyperlink
to add the following forms to your Product List:
- FHA (1004)
- Condo (1073)
- FHA Condo (1073)
- FHA Multi Unit (1025)
- Multi Family Unit (1025)
- Recertification (1004D)
- Residential Appraisal (1004)
- Condo Investment (1073, 1007, 216)
- Exterior only Residential Report (2055)
- Property Inspection for repairs (1004D)
- FHA Condo Investment (1073, 1007, 216)
- Single Family Investment (1004, 1007, 216)
- Exterior Only Investment (2055, 1007, 216)
- FHA Single Family Investment (1004, 1007, 216)
- Condo Investment w/Comp Rent Schedule (1073, 1007)
- FHA Condo Investment w/Comp Rent Schedule (1073, 1007)
- FHA Single Family /w Comparable Rent Schedule (1004, 1007)
- Single Family Investment w/Comparable Rent Schedule (1004, 1007)
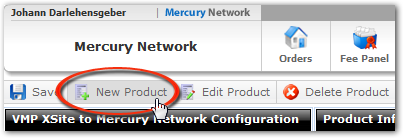
- To add new products to the list individually, click New
Product.
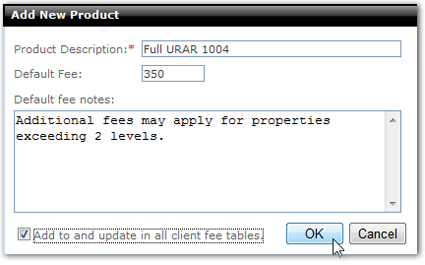
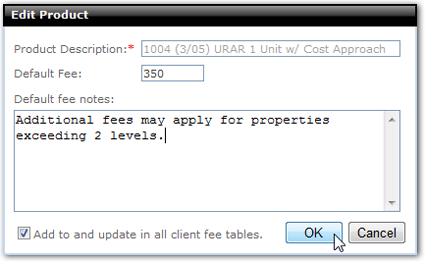
- In the window that appears, enter a Product Description, the Default Fee for the product, and the Default Fee Notes that should be displayed when an order is placed for this product.
- If you would like to add or update this product in all the fee tables where it appears (such as custom fee tables) check the box at the bottom of the window labeled Add to and update in all client fee tables.
- When you're finished with the new product, click OK
to add it to your product list.
- In the list, use the Mercury Network Product column to choose what product in Mercury Network should be ordered when a client selects this product on your order form.
- Click Save in the upper-left to commit your changes.
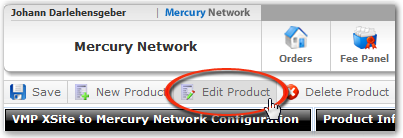
- To edit a product, select that product in the list, then click
Edit Product.
- In the window that appears, you can change the Default Fee and edit the Default Fee Notes.
- If you would like your changes to be reflected in all your fee tables where it appears (such as custom fee tables) check the box at the bottom of the window labeled Add to and update in all client fee tables.
- When you're finished editing the product, click OK to
save your changes.
- Click Save in the upper-left to commit your changes.
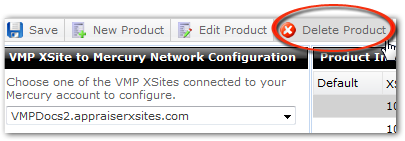
- To delete a product from the list, select that product, then click the
Delete Product button.
- In the window that appears, click Yes or
No to confirm/deny that you want to delete the selected
product.

- Click Save in the upper-left to commit your changes. The selected product will be immediately removed, and this will be reflected in any fee tables where that product appeared.
- In the window that appears, click Yes or
No to confirm/deny that you want to delete the selected
product.
- If no products have been added, the Product Information panel on the
right offers a hyperlink to add a list of the default. Click the hyperlink
to add the following forms to your Product List:
For any product in the list, you can choose whether it should appear on the default order form your clients use to order appraisals on your VMP XSite. To choose which products should appear by default:
- In the list of products, you'll see a Default column. If
there is a green check in this column, it indicates the product will appear on
the default order form. If there is no green check, it indicates that the
product is available to be assigned to any fee table, but will not appear on
the default order form.

- To place or remove the check mark, simply click in the column for the product you'd like to change.
- Click Save in the upper-left to commit your changes.
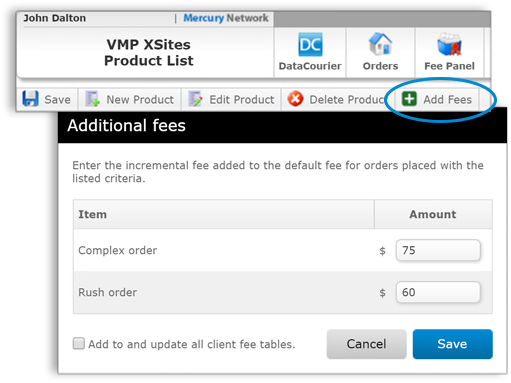
You can add fees for Rush and Complex orders which will automatically be included in the overall fee for orders where those characteristics have been selected. Here's how:
- On the toolbar, click Add Fees.
- In the Additional fees window that appears, enter the fees in the Amount field for Complex order and Rush order.
- If you'd like these fees to be added to all of your client-specific fee
tables, check Add to and update all client fee tables. If
you're changing existing fees, checking this box will update that existing fee
in all your client fee tables.
Mercury
Network and its products are trademarks |