Using the QuickBooks Integration |
||
As you begin using the QuickBooks integration, there are a few things to keep in mind:
- You'll need to create a Vendor record in QuickBooks for every appraiser on your fee panel in Mercury Network.
- You'll need to create a Customer record in QuickBooks for each of your clients in Mercury Network.
- You'll need to add an Item in QuickBooks called Appraisal Fee.
There are also a few requirements before receivables and payables can by synced with QuickBooks. Below, you'll find detailed info about all of this.
Create the "Appraisal Fee" Item
When QuickBooks syncs with Mercury Network, the fee for the appraisal must have an "Item" in QuickBooks. Here's how to create this appraisal fee Item:
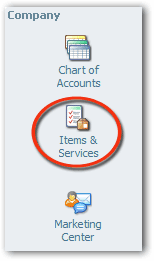
- From QuickBooks Home, in the Company
area, click Items and Services.
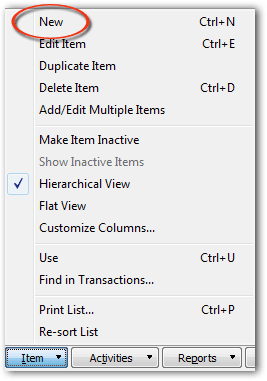
- Click Item in the lower-left corner, then choose
New from the menu.
- In the dialog that appears, you'll need to do a few things:
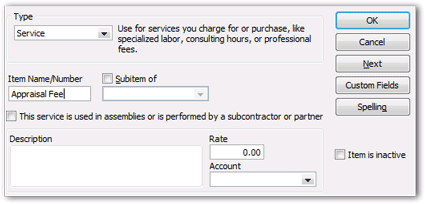
- Use the Type drop-down to select Service.
- In the Item Name/Number field, type Appraisal Fee.
- Click OK to save your changes.
Now, this fee item will be used for appraisal fees that are synced to QuickBooks from Mercury Network.
Create a Vendor record
A Vendor record must be created in QuickBooks for each appraiser before accounting information can be synced from Mercury Network.
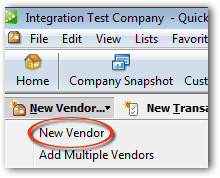
- In QuickBooks, access the Vendor Center.
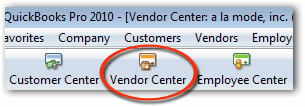
- Click New Vendor and select New Vendor
in the drop-down.
- Now, in the dialog that appears, type the appraiser's Company
name as it appears in Mercury Network into the Vendor
Name field in QuickBooks. For example: If you looked at
the appraiser's profile in Mercury Network, you would take the
company name from the second line and enter it in the
Vendor Name field in QuickBooks.

None of the other fields in this dialog are required, although you can complete as many of them as you like.
- Click OK to save the new record.
That's it. Now this appraiser is set up to sync accounting information from QuickBooks.
Create a Customer Record
A new Customer Record must be created in QuickBooks for each client before accounting data can be synced from Mercury Network.
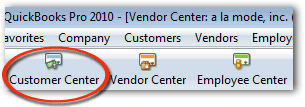
- In QuickBooks, access the Customer Center.
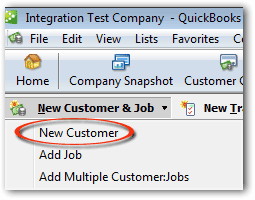
- Click New Customer & Job, then select New
Customer in the drop-down.
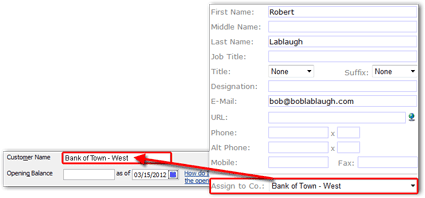
- In the dialog that appears, you'll need to enter the client's company name
in a specific format:
- The description of the format is "Company name space dash space Branch".
- For example, if you have a Mercury Network client with a company
name of Bank of Town and a branch named
West, you would create a Customer record in QuickBooks with
the following name exactly as it appears in the contact details:
Bank of Town - West
- Click OK to save your changes.
This client is now ready to sync accounting information to QuickBooks from Mercury Network.
Requirements for QuickBooks syncing
Here are the requirements for an Accounts Receivable item to be synced with QuickBooks:
- The invoice must be for an order on your VMP XSite. Ad-hoc invoices will not be synced.
- The invoice must contain an invoice date.
- The invoice date must be greater than the date your QuickBooks integration was enabled or the Last Sync Date.
- The fee must be greater than $0.
- Bill to contact info must be entered on the invoice
Here are the requirements for an Accounts Payable item to be synced with QuickBooks:
- There must be a vendor assigned to the order.
- The first completion for the order must occur after the QuickBooks integration was enabled or the Last Sync Date.
- Orders will only sync with Accounts Payable after the first completion. If the order is completed more than once, only the first completion will actually be synced into QuickBooks.
Issuing a refund
If you need to issue a refund to a client, you can do so in QuickBooks. Here's how:
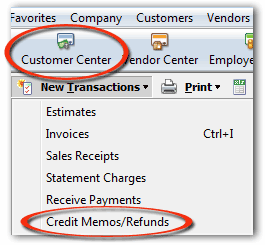
- In QuickBooks, click Customer Center, then select
Credit Memos/Refunds in the drop-down.
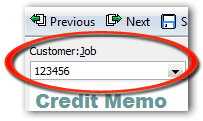
- In the dialog that appears, use the Customer: Job
drop-down to select the customer and the job for which you're issuing the
refund.
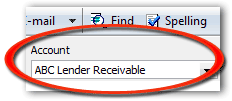
- Make sure the correct account is selected in the Account
drop-down. You'll only see this option if you have more than one Accounts
Receivable account in QuickBooks.
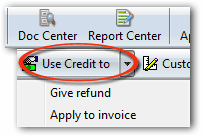
- Click the Use Credit to menu item and choose
Apply to invoice.
- In the Apply Credit to Invoices window, choose the invoice to which you want to apply the credit.
- Click Save and Close in the bottom-right corner.
Mercury
Network and its products are trademarks |