My Columns |
||
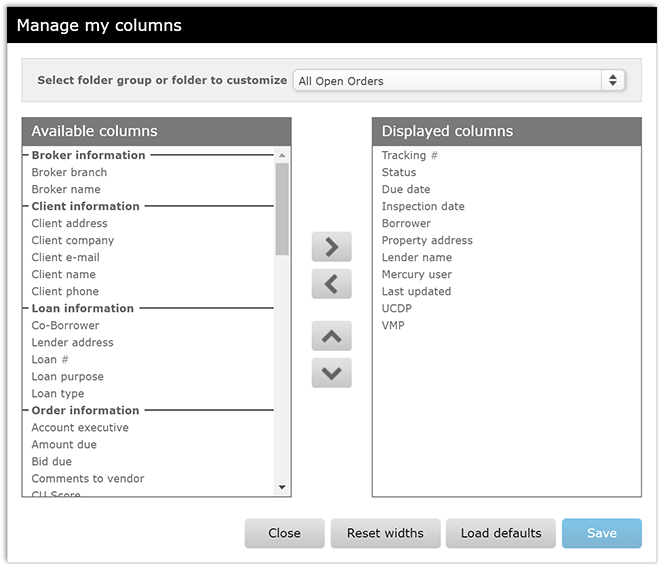
You can choose which columns are displayed in the order view, as well as the order in which they appear. Plus, you can display a different set of columns for each status folder. Here's how:
- On the toolbar, click My columns.

- In the window that appears, there are several options:
- Use the top drop-down list to select which folder group or folder you'd
like to customize.
- Selecting a group will customize all the folders in that group at one time. For example, selecting UCDP will customize the UCDP Submitted, UCDP Failed and UCDP Not Accepted folders.
- To customize a specific folder, just select that folder from the drop down. You can have a completely different set of columns in a unique order for each status folder.
- To pick your custom items, just click on an item from the Available columns list, then, drag and drop it into the Displayed columns list.
- Order your displayed items by clicking on the item and drag it up or down in the list.
- To remove a displayed item, simply double-click on the item or drag and drop it back to the Available columns list.
- If you prefer, you may select 1 or more items and use the arrow keys to move items between lists or change the display order.
- You may also reset your order view to their default items:
- Click Reset widths to set each column width back to the original size.
- Click Load defaults to revert your customized columns back to Mercury's original columns for this folder.
- Click Save to apply the changes you've made to your columns.
- Click Close to close this window and return to the
order view.

- Use the top drop-down list to select which folder group or folder you'd
like to customize.
Mercury
Network and its products are trademarks |