Professional |
||
The options on the Professional tab vary depending on what type of vendor you are.
Professional Experience - Appraisers
On the Professional tab, check the box for each type of assignment that you fulfill. As you select each item, provide the year you started servicing that type of assignment.
Just below the assignment types, place a check next to each
designation/certification you possess. If you hold an FHA
designation, make sure that you check the FHA box - leaving it
unchecked can prevent you from receiving FHA work.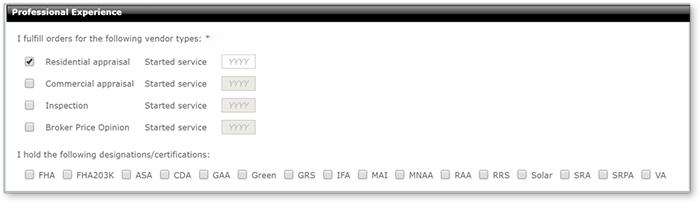
Here's what the designations mean:
FHA — designated roster of HUD/FHA appraisers/inspectors
FHA203K — designated roster of HUD/FHA appraisers/inspectors for FHA 203k loans
ASA — American Society of Appraisers member
CDA — DAC (Designated Appraiser Coalition) Coalition Designated Appraiser
GAA — NAR (National Association of REALTORS) General Accredited Appraiser
Green — AI (Appraisal Institute) appraiser who is knowledgeable in the valuation of environmentally sustainable properties
GRS — AI (Appraisal Institute) General Review Specialist
IFA — NAIFA (National Association of Independent Fee Appraisers) Independent Fee Appraiser
MAI — Member of the Appraisal Institute
MNAA — Member of National Association of Appraisers
RAA — NAR (National Association of REALTORS) Residential Accredited Appraiser
RRS — AI (Appraisal Institute) Residential Review Experience
Solar — AI (Appraisal Institute) appraisers with a degree of expertise in appraising homes utilizing solar energy systems
SRA — AI (Appraisal Institute) Senior Residential Appraiser
SRPA — AI (Appraisal Institute) Senior Real Property Appraiser
Professional Experience - AMCs
Indicate how long you've been in business using the In business since fields.
Check each type of appraiser you employ.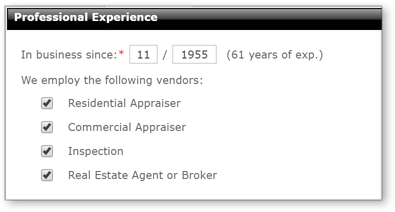
Licenses
In the Licenses section, you can manage your existing licenses and
add new ones, plus you'll be able to see which licenses have a document
attached, as well as the name of the document.
|
||||
- To add a license, click Add in the top toolbar, and
select License from the drop-down menu, or click Add
new license in the Licenses section.

- In the window that appears, enter the requested information.
- Next to License Document, there are a couple of options:
- If you have unlinked documents, you will see a drop-down listing available license attachments. You can select one, or choose to Upload new...
- If you do not have any unlinked documents, simply click on
Upload License to attach a license.
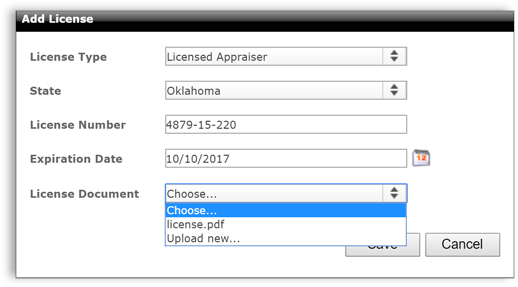
- Click Save to add this license to your profile.
- Repeat steps 1 - 4 if you need to add additional licenses for your Mercury profile, such as if you work in multiple states.
If you simply need to add an attachment to an existing license, from the
license row you can click Choose from existing to select an
unlinked license attachment, or edit the license to upload a document.
Mercury Network validates license information using the national registry available at http://www.asc.gov. Make sure you enter your license exactly as it appears in the national registry - if your license is off by one number or has any additional characters, your license won't validate properly, which can prevent you from receiving orders.
|
||||

To manage any license, click the Edit or Remove icons on the far-right of any existing license listed in the Licenses section. If you remove a license, the associated document will be deleted.
An orange alert icon  to the left of your license indicates that one of
your clients has requested that you review the attached document. In this case,
you should have received a notification email with any comments your client sent
regarding changes they require. To update the document, click
Edit to open the dialog, then click on the document name to
replace it with a different document. If your document is accurate, but your
license information is incorrect, please delete the entire credential and start
over.
to the left of your license indicates that one of
your clients has requested that you review the attached document. In this case,
you should have received a notification email with any comments your client sent
regarding changes they require. To update the document, click
Edit to open the dialog, then click on the document name to
replace it with a different document. If your document is accurate, but your
license information is incorrect, please delete the entire credential and start
over.
Insurance Policies
In the Insurance Policies section, you can manage your existing policies and add new ones. You'll also be able to view any existing policies and see which ones have a document attached as well as the name of the document.
- To add an insurance policy, click Add in the top toolbar,
and select Insurance Policy from the drop-down menu, or click
Add new policy in the Insurance Policies
section.

- When filling out the policy information, enter the aggregate or total amount covered by your insurance policy rather than the per-incident coverage.
- Next to Insurance Document, there are a couple of options:
- If you have unlinked documents, you will see a drop-down listing available insurance attachments. You can select one, or choose to Upload new...
- If you do not have any unlinked documents, simply click on Upload Insurance to attach an insurance document.

- Click Add to save this insurance information and close the dialog.
- To add multiple policies, repeat steps 1 - 4 for each policy.

To manage any policy, click the Edit or Remove icons on the far-right of any existing policy listed in the Insurance Policies section. If you remove an insurance policy, the associated documents will also be deleted. If you simply need to add an attachment to an existing insurance policy, you can click Choose from existing to select an unlinked insurance attachment, or edit the policy to upload a document.
An orange alert icon to the left of an insurance policy indicates that
one of your clients has requested that you review the attached document. In this
case, you should have received a notification email with any comments your
client sent regarding changes they require. To update the document, click
Edit to open the dialog, then click on the document name to
replace it with a different document. If your document is accurate, but your
insurance information is incorrect, please delete the entire credential and
start over.
If E&O insurance is not required in your area, check the box in the Insurance Policies section that states I am not required to carry E & O insurance.
W-9
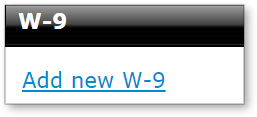
Here, you can enter your W-9 information so it's available to clients on your fee panel. We store this information securely on our servers, then provide a PDF to your fee panel clients which they can review along with your other documents. Here's how to add your information:
- Click Add new W-9.
- In the form that appears, you'll see that a lot of your information is already populated. So, enter any remaining W-9 details just like you would on the W-9 form, then click Save.
- Now, your W-9 will be listed, and there are a few things you can do:
- Click the link in the W-9 Document column to view your W-9 as your clients will see it.
- Click the Edit icon to make changes to your W-9.
- Click the Remove icon to delete this W-9.

Trainees
Appraiser supervisors can add trainees to their profile, along with supporting documents. Those trainees can be added to orders in Order Details when they're working on an appraisal so their information will be visible to the client. Here's how to add a trainee to your profile.
- Click Add trainee.
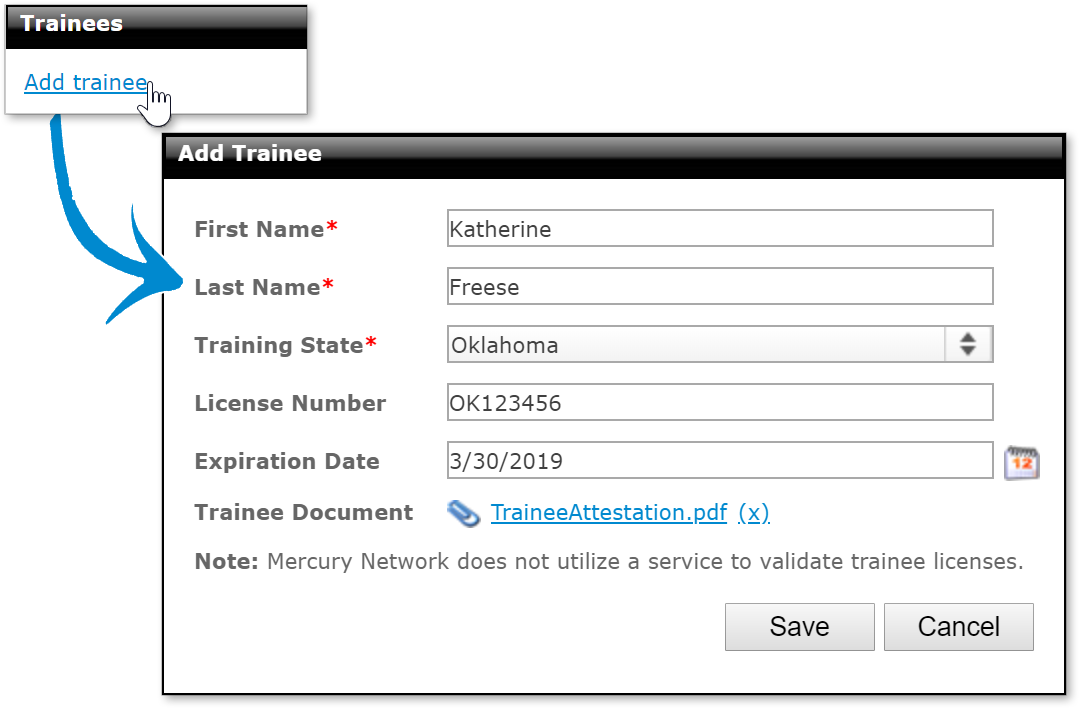
- In the form that appears:
- Enter the trainee's first and last name.
- Enter the training state. The training state must match a state where the supervisor has a current, valid license.
- If the trainee has a state license, enter the license number and expiration date.
- To attach any relevant documents, click the paperclip icon, then select the file on your device.
- Click Save.
Now, you'll see the trainee is listed in the Trainees section of your profile, and there are a few things you can do:
- Click the link in the Trainee Document column to view the document.
- Click the Edit icon to make changes to the trainee information.
- Click the Remove icon to delete the trainee.

Attachments
In the Attachments section, you can upload examples of your work, resumes, background checks, and other documents. License and insurance documents are uploaded separately, so this is not the place to attach those. Here's how to add attachments:
- Click Add on the toolbar and choose
Attachment. Or, in the Attachments section, click
Add new attachment.

- In the window that appears, use the drop-down to choose which type of document you're uploading.
- Click Upload, then browse to and select the file you intend to upload.
- To update an existing document, click the Update icon. In the Update Attachment window that appears, you can remove the document and upload a new one in its place. You can also use the Attachment type drop-down to select a different type of document.
- To remove any document you've uploaded, click the Remove icon on the right of any document in the list. Removing any document in this list deletes the document.
- Click Save to keep your changes and return to the Professional tab.
An orange alert icon to the left of any document indicates that one of
your clients has requested that you review the document. In this case, you
should have received a notification email with any comments your client sent
regarding changes that need to be made. To update the document, click
Update to remove the existing document and replace it with your
updated document.
Permissions
In the Permissions section, you can configure permissions for each
user. If you're editing the admin user, you won't see the Permissions
section since they already have all available permissions.
- View/Manage Other Users' Orders - Check this box to allow the user to manage order that are assigned to other users. Click the Users' link to select which users' orders this user can manage.
- Add/Manage User Accounts - Check this box to allow the user to create new users and manage existing users' settings.
- Manage Account - Check this box to allow the user to add and/or update the credit card on file used for transaction fees and view the transaction fee invoice history.
Notifications
In the Notification Settings section, check each box to enable the indicated notification.
- The My Orders section lets you choose the notifications for
orders that are assigned to the selected user. Here, you can choose different
notification types, such as text messages or a daily summary email.

- In the Managed Orders section, select notifications that should occur for each selected event on one of the user's managed orders. Like the My Orders section, you'll be able to choose notification types such as a text message, a fax, or a daily summary email.
- Click the Tool Icon next to Send an e-mail to choose specific events that should trigger an email.
Mercury
Network and its products are trademarks |