Client Groups |
||
Client Groups give you detailed control of settings for clients who order appraisals through Mercury Network or your XSite. The settings affect the group as a whole, as well as very specific settings for each individual member of the group. To set up a Client Group:
- Once you've logged in to Mercury Network, click Clients in the toolbar at the top.
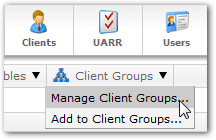
- Click Client Groups and select Manage Client
Groups from the drop-down menu.

- In the Client Groups window that appears, click
New Group to create a new Client Group.

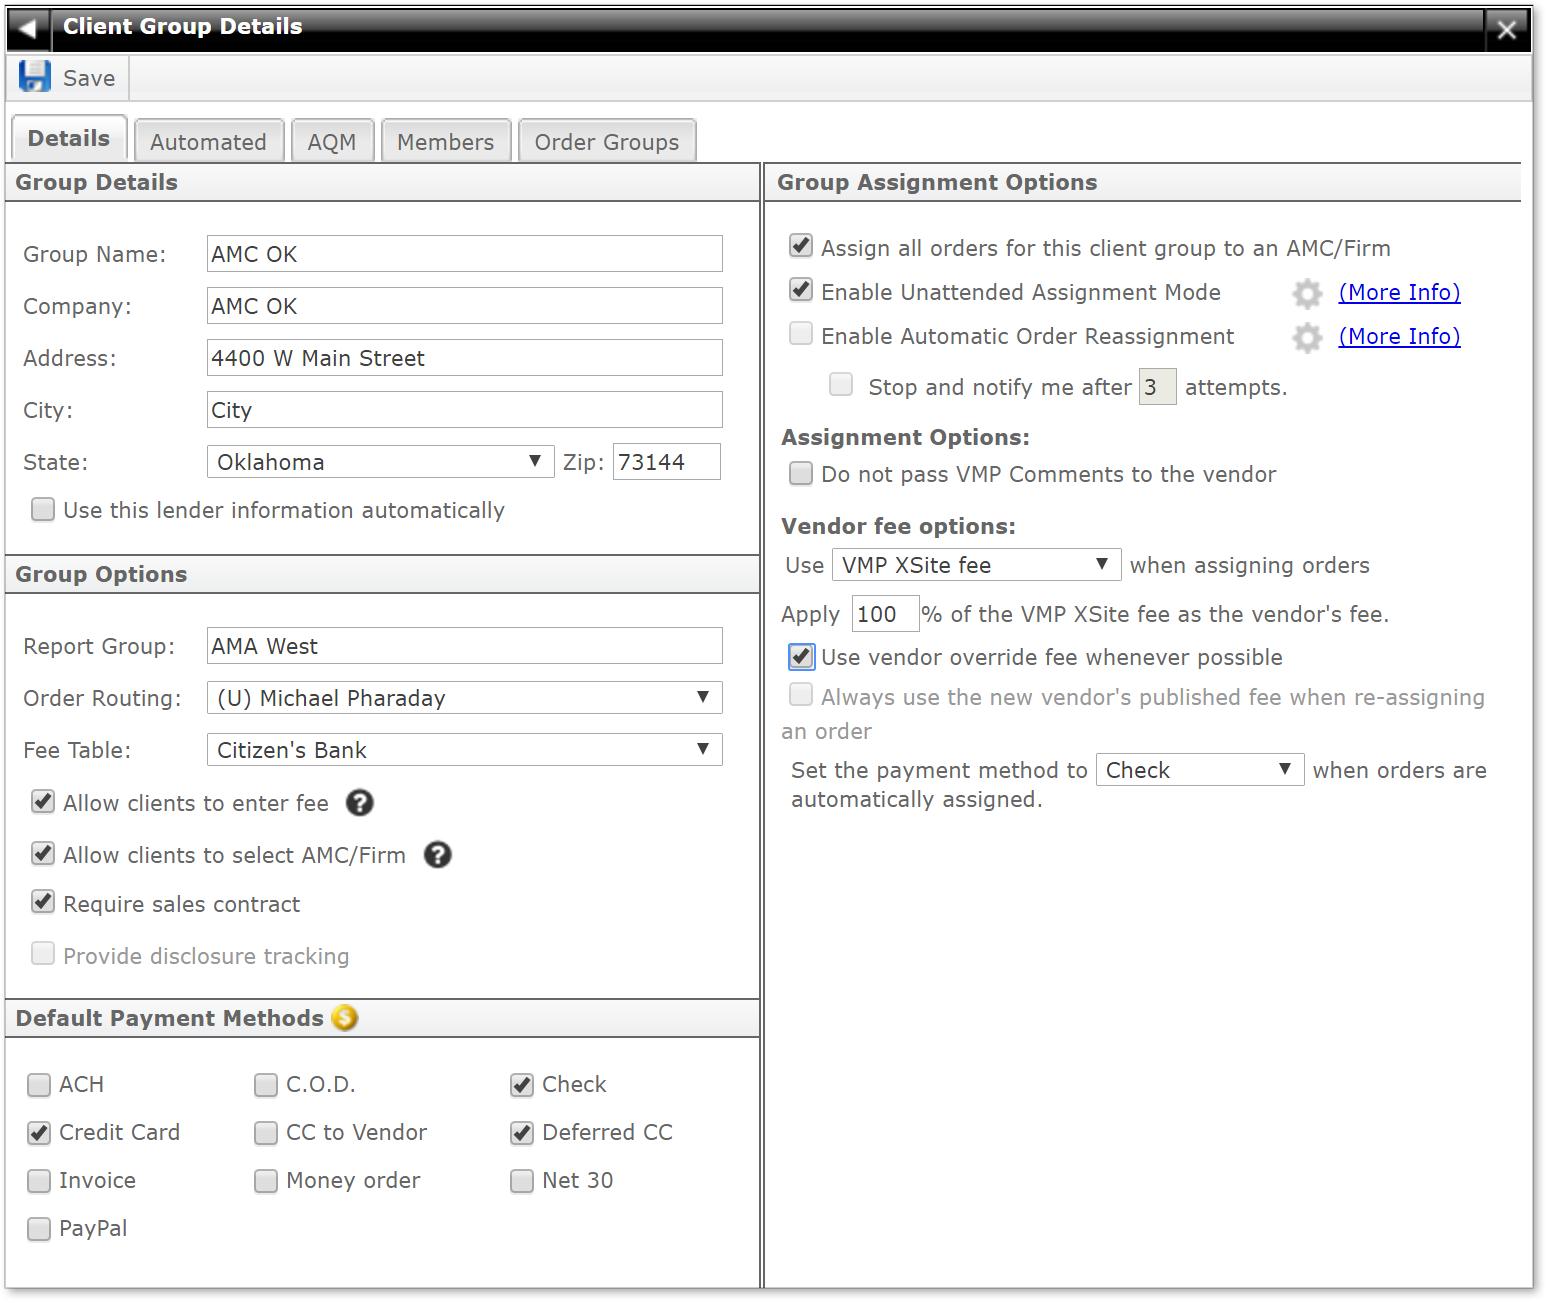
- In the Client Group Details window, there are several
items to fill out. Here's a description of the available options:

- Group Details
-
- Group Name: A friendly name used to identify this group
- Company: The name of the client's company; this information may be shown to borrowers during SureReceipts delivery of the appraisal - see the Automated tab.
- Address, City, State, and Zip: The client's company address
- Check the Use this information to populate the lender information automatically to use the company address for any order placed by a member of this Client Group.
- Group Options
-
- Report Group: Enter a name for the report group to which this Client Group should belong. This will be used when setting up custom reports with Mercury Network's Client Relations.
- Order Routing: Using the drop-down, select the Routing Group that should be used for any orders placed by a member of this Client Group. This ensures that the correct staff will be selected to manage appraisal orders placed by members of this Client Group.
- Fee Table: Selects a fee table to be used for orders placed by anyone in this Client Group.
- Check Allow clients to enter fee to let clients enter their own fee when ordering a product. This means that the client could enter a fee other than what is specified in the fee table. Leave this blank to automatically populate the fees you've entered for the product in VMP XSites Preferences.
- Check Allow clients to select AMC/Firm so that clients placing orders on your XSite will have the option to choose the AMC from your fee panel to be assigned to the order.
- Check Require sales contract so this client will always be required to upload a sales contract for orders with a loan purpose of Purchase. In order so ensure you always know the loan purpose, we recommend you place a check in the Required column for Loan purpose in the Configure order form page, so that field will always be required on your order form.
- Check Provide disclosure tracking to track whether or not the disclosure is complete or pending expiration.
- Default Payment Methods
- Check each payment method you've approved for this client to use when placing orders.
- Group Assignment Options
- Use these options to choose how orders are assigned, whether or not VMP
comments are passed to the vendor, and which fees to use when the order is
assigned.
- Assign all orders for this client group to an AMC/Firm: When checked, all orders for this client group will be assigned to an AMC/Firm vendor.
- Enable Unattended Assignment Mode: When this box is checked, orders received from VMP clients are automatically assigned to a vendor using your current ISS settings.
- Enable Automatic Order Reassignment: When checked,
this option automatically assigns expired and declined VMP orders using
your ISS settings.
- Stop and notify me after _ attempts: This limits the number of attempts to reassign the order before stopping to notify you.
- Assignment Options: Check this box to indicate whether or not you want to pass VMP comments to the vendor.
- Vendor fee options: Choose the default fee to use when assigning orders from the drop-down menu. You can choose to use your VMP XSite fee, My product fee, or the Vendor's published fee. If you select your VMP XSite fee, you have the option to apply a percentage of that fee as the Vendor's fee. Check the box below it to use vendor override fee whenever possible.
- After you've entered the necessary information for this Client Group,
click Save on the upper-left. Click the back arrow (
 ) on the upper left to return
to the list of Client Groups, or click the X icon (
  ) on the upper right to return to
your list of clients.
More:
Mercury
Network and its products are trademarks |
 Assign contacts to Client Groups